Wednesday, June 8, 2011

Tutorial 3: Digiscrapping 101 Beach Theme

Hey guys! Congrats on reaching Tutorial 3

If  this is your first time to visit, please click on the button to the right side of this page that says “Start you tutorials here!”.


It’s been a while since Tutorial #2, but I did it on purpose, so that you guys could practice (LOL, really… I’ve been very busy). But here’s another one, which will definitely be more exciting than the previous tutorial, because I’ll give you a whole Digiscrap Kit to play around with. You guys deserve a reward after all the grueling practice.

So below is the sample digiscrap with the Beach Theme:
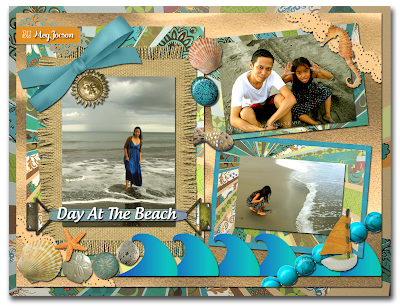
Finished Digiscrap: Beach Theme

And below are your elements. You may click on the pictures to see their original size, and then you can right click on the picture and choose Save As to download.
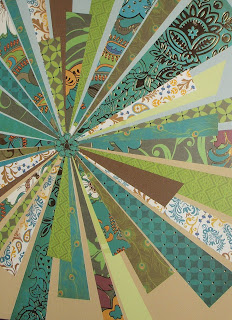
Background 1


Background 2

Background 3

Background 4

Blue bough

Blue Fastener

Blue ribbon silk

Fish

Ocean Wave

Orange lace

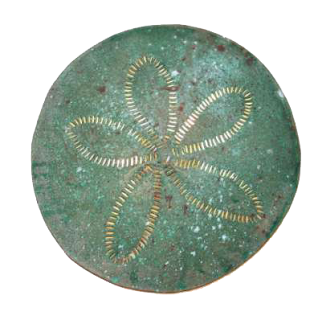
Sand dollar blue

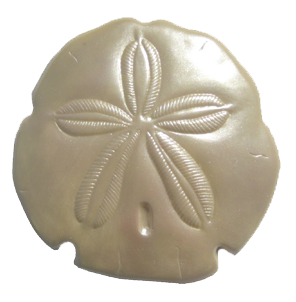
Sand dollar frosted

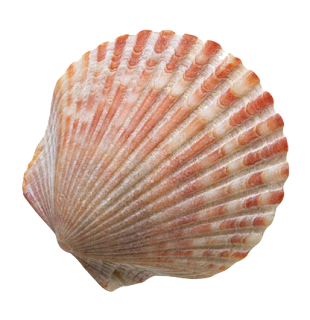
Scallop Pink

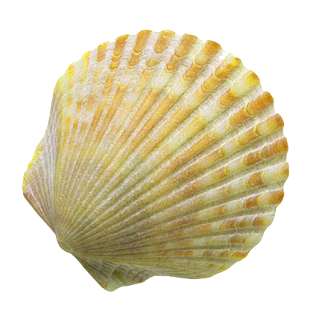
Scallop Yellow

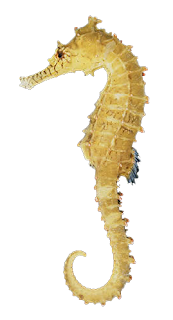
Seahorse

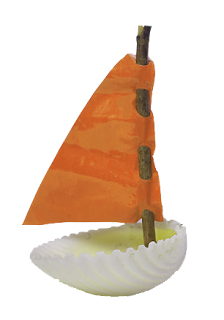
Shell sailboat

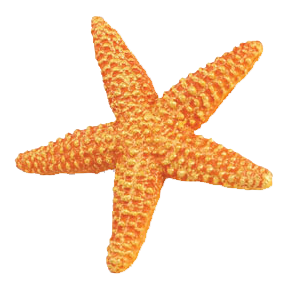
Starfish

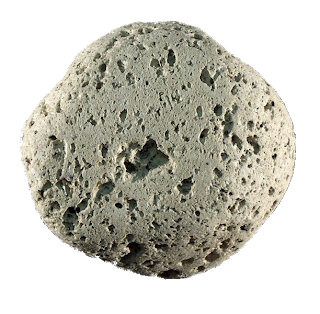
Stone Pumice

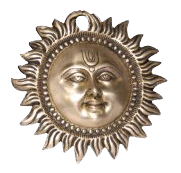
Sun Pendant

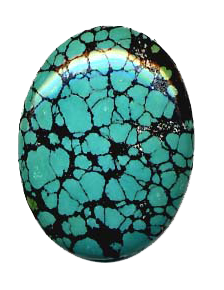
Turquoise


Now that you have the kit, and you guys already know how to convert files, the tutorial will be about how to put them together.

Let us start with making sure all the elements in the kit are downloaded. And make sure you also have three photos you want to put in the digiscrap. You may open all the images up in Photoshop, but it might be a little confusing at this stage. Once you are sure you have all the elements downloaded, it’s time to start:
  1. Open up Photoshop and then open a new document and make sure it has the dimensions as the screenshot below.

  1. My screen shot shows that I have opened up some of the elements, but you may start by opening Background 2 in Photoshop. Once Background 2 is open, hold down Ctrl+A and then use the Move Tool (refer to Tutorial 2 on how to use the Move Tool) to drag the image to the new document.

TIP: You may use Ctrl + (-) minus sign to make the document smaller and Ctrl + (+) plus sign to zoom document.

  1. Now that you have dragged Background 2. Make sure that it is at the center of the new document. Now let’s rotate the image to make sure it’s aligned to the document.

  1. Make sure that Background 2 is still under the Move Tool. You will see the little squares at the corners of Background 2 (see red arrow). Those little things are called Transform Controls. Click on one of the Transform Controls.


  1. Once you click on one of the Transform Controls, right click inside the image and select Rotate (see red arrow). And then type 90.00 on the Angle Field (see orange arrow.) That will rotate the image automatically to your desired angle.

  1. Make sure that Background 2 fits perfectly to the new document by using the Move Tool to adjust the size.

  1. Now you want to add SHADOW EFFECT, to make it look like Background 2 was pasted pn the new document. On the tabs click on Layer and then Layer Style and click on Drop Shadow.

  1. This window will then pop up. You may copy the settings in the screenshot below.

  1. Open Background 1 and then drag the image to the new document. Use the Transform Controls to adjust the size. And add the shadow effect. Refer to the Finished Digiscrap: Beach Theme to see the settings.

  1. Go back to Background 1 again and drag the image again to the new document. Use the transform Controls to adjust the size and rotate it to achieve the right angle. And add the shadow effect.

  1. And then open the Ocean Wave image and then use the Move Tool to drag the image into the new document. Adjust the size and then refer to the Finished Digiscrap: Beach Theme to see the settings.

  1. You’ll see that there are 6 ocean waves but we only have one. You may go back to the ocean wave image and drag another one into the new document. But you’ll have to adjust the size again, and you might worry about the accuracy of the size. Instead of doing it, you may click on the window to your lower right. If you followed the steps promptly, the ocean wave should be Layer 4. Right click on Layer 4 (see red arrow) and then choose Duplicate Layer (see next screenshot). It will automatically put another ocean wave on top of the first one. Use the Move Tool to move it the left.


  1. Next, open Background 3 and drag the image into the new document as well. Adjust the size and then add the shadow effect.

  1. Go back to Background 1 and drag another copy to the new document. Make sure it is on top of Background 3. Adjust the size and add shadow effect.

  1. And now add more ocean waves. Follow the steps in #13.

  1. All your images should have the shadow effect. Add the other elements as follows:
    1. Background 4
    2. Your 3 photos.
    3. Orange Lace (follow step #13 to make sure you have the orange lace on both sides of the document)
    4. Sun pendant
    5. Blue bough
    6. Blue silk ribbon to replace the blue beads in the finished document.
    7. Blue fastener
    8. Scallop Yellow
    9. Sand dollar frosted
    10. Sand dollar blue
    11. Stone pumice
    12. Starfish
    13. Scallop pink
    14. Turquoise
    15. Fish
    16. Seahorse
    17. Shell sailboat

  1. Add the text by clicking on the Text button (see red arrow). And click on top of the blue fastener where you want the text to appear. Choose your preferred font on the dropdown tool (see orange arrow). You will be restricted to the fonts in your computer. But you may download fonts from www.dafont.com .
  1. Adjust the font size by tweaking the numbers on the font size field or using the dropdown menu (see green arrow). And always choose Smooth as font setting (see blue arrow). Don’t forget the shadow effect.

  1. Now that your digiscrap is done, you may save it by clicking on File> Save As (see blue arrow). A pop up should appear.

  1. Save the document as PNG by clicking on the dropdown menu under format (see red arrow) and then choose PNG. And then hit Enter.

  1. Close what you have just saved. Close all the other graphics but keep Background 1 open in Photoshop.

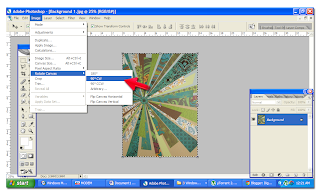
  1. On Background 1, click on Image> Rotate Canvass and then choose 90 CW (see red arrow).

  1. Re-open the document you just saved. Hold down Ctrl+A and then drag the image into Background 1. Make sure that you adjust it so that it is smaller than Background 1. Add shadow effect.

  1. And then you may now save the finished document as JPEG by following the steps in #19 and #20, except you choose JPEG instead of PNG.


Voila! You’re finished. You may now upload your first digiscrap in facebook!


Let me know if you guys have any questions. Feel free to leave a comment. I have changed the settings so that anyone can leave a comment without having to sign up onto anything.


Please rate this tutorial if you find it interesting, fun, useful or difficult! (see buttons below)

Thanks guys!


A LOOK INTO WHAT'S NEXT: Now that you know how to put an entire digiscrap together, I'm going to give you guys a tutorial in basic photo editing. We're going to practice on some pictures and you'd be so amazed at how great a simple picture could be after some changes in Photoshop! That's what's next!


Friday, June 3, 2011

Tutorial 2: Filetypes and Filetype Conversion


Welcome to Tutorial 2!

If  this is your first time to visit, please click on the button to the right side of this page that says “Start you tutorials here!”.

In Tutorial 1 we talked about your work area and a little about "Filetypes". By now, you should have an idea of how quite time-consuming “digital scrapbooking” is. Just looking for graphics and it already takes a long time but your hardwork will definitely payoff! Just you wait!

On this tutorial we’re going to learn more about FILETYPES.

The previous tutorial tackled PNG, jpeg, psd and tiff, as the file we will be using in this craft and that 90% of the time PNG is what we use because of it’s transparent background. I also mentioned that MOST PNG files are transparent but—NOT ALL! If you did your exercise on Tutorial 1, you must’ve already figured that out.


BUT there’s a way for us to turn PNG files with background into genuine PNG files!

Here’s how!

Remember that what we’re removing is the background, because we want to be able to paste them on top of the other like this:
But can you paste it if your PNG file looks like this?


PLEASE NOTE: All backgrounds could be removed but you might sacrifice the quality of the image. Go for graphics that have a “solid-color” background, meaning their background is just one color and not texturized. Please see image below:


So how do you remove the background?

1. Open the file in Photoshop.


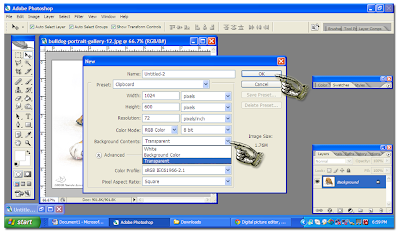
2. And then click on File > New to open a new document. A pop up will then appear that will show you the size and the properties of this new document you’re opening. Make sure you click on Background Contents and choose Transparent. 


3. And then the new document should look like this. A transparent background should look checkered. 


4. Minimize your picture screens to make sure you see everything in your window. Now you should see both the bulldog’s picture and your new document.

5. Click on the Magic wand tool to your left. And then click on the white background that you want to remove. Doing that will highlight the white background.


6. Right click on the white background so that a dropdown menu appears.


7. Choose Select Inverse so that this time the bulldog is highlighted. 

8. Then click on Move Tool to your left.


9. Using the move tool, drag the bulldog into the new transparent document.


10. To clean up the image, use the Eraser Tool to your left. Now you have a transparent image!


11. Since the new document is too big, use the Crop tool to make it smaller. And then hold it down to the image until you get the right size. Right click it and then choose Crop. 


12. Now it’s done! You may save the image by clicking File and then Save As and make sure you choose PNG as the filetype.

13. So let’s say you have a fancy background. Open it in Photoshop and then, using the move tool, drag the bulldog image into the fancy background for it to look like this. Isn’t it awesome!


Okay, so we already know how to remove the background from “False PNG’s”, but you know what? I HAVE GOOD NEWS FOR YOU! Now that you know how to remove the background you can do it on ANY FILETYPE, whether the image is jpeg or tiff you can always remove the background by doing the same thing! 


MORE ABOUT FILETYPES:

  • JPEG- is what most pictures are. Most great quality pictures are in jpeg format.


  • TIFF - is usually for high-definition and large photos. Saving images in TIFF format preserves the sharpness of the image, but it also takes a lot of space in your computer memory.


  • PSD - is a Photoshop-specific picture format, where all layers are preserved the way they are. Usually, if you're editing an image in Photoshop and you have multiple layers, but you couldn't finish it yet, you can always save it as PSD. In this format the layers are not merged into a flat image like the JPEG, TIFF and PNG. Now, I know this sounds very technical, but let me explain this in English, if you look at the screenshot on Number 13 in the Tutorial you'll see that the bulldog image was dragged into the fancy background. The bulldog is a PNG file and the fancy background is a JPEG file. The background is LAYER 1 and then the bulldog is LAYER 2 and that's what I mean by LAYERS. Sometimes you want to put more images, like flowers or balloons, but you have to postpone it for the next day. You can save the file as PSD so that you can still manipulate the layers, like, transfer the bulldog to the other side of the background when you finally decide to put flowers on the side where the bulldog was. If you don't save it as PSD, the bulldog will never be movable because LAYER 1 and LAYER 2 will automatically be merged.


EXERCISE: Download images from Google and experiment on putting together different images by converting them to PNG format. Your background could stay as JPEG since it's just where you paste the PNG images. Enjoy! 

I hope this was very useful!

Please rate this tutorial if you find it interesting, fun, useful or difficult! (see buttons below)

Thanks guys!


Please note that all layouts are custom-made by Meg Jocson and Kick-Ass Ads.


A LOOK INTO WHAT'S NEXT: We're going to practice making a "Digital Scrapbook with all the elements to help you do it yourself. These elements are images that are readily downloadable but definitely needs conversion into PNG! "That's what's next!


Thursday, June 2, 2011

Tutorial 1: Your Work Area And An Intro To Filetypes


This might be your first time in "Digital Scrapbooking" so we will start with the very basic, which is the work area. 

"Digital Scrapbooking" is time-consuming at first and when I say time-consuming, I mean it! And even more time-consuming for people with (metaphorical) OCD, like me. 

  • Start with a well-organized area, like a chair and a laptop computer! (haha--I know!) But kidding aside, since we're foreseeing long work hours, you need to be comfortable. Occassional standing and stretching should be done at least twice an hour so that you won't strain your back or develop carpal tunnel.


  • As soon as all the hardware is set, it's time the ball rolls! You must have the Photoshop software, enough memory space in your computer and, ofcourse, a good internet connection.


Scrapbooking 101: 
  • To give you an idea, this is how my screen looks like:

You might feel puzzled but don't fuss, your screen will definitely look like this in the next tutorials! :)

  • What you can see on my screenshot is Photoshop and a bunch of graphics. You can customize your graphics, as I do (...and I will teach you how) but since you're just on Tutorial #1, you can always use ready-made graphics. This means that Google will be your "numero uno" bestfriend, if it's not your bestfriend yet. :)
www.google.com

  • But it is not as simple as clicking google images and typing what you want to look for, you have to know "FILETYPES". My screenshot shows graphics that are all transparent, meaning, when you copy and paste them on top of the other, you don't get that icky white background. Look at the Smiley below. The one to your left definitely has that white background but the one to your right doesn't and it's definitely the way to go!


  • FILETYPES: There are different filetypes; there's PNG, jpeg, psd, tiff and so many more, which you don't have to mind because we won't use them. Now, the filetype which we will use 90% of the time, due to it's transparent background, is "PNG"


  • When you type your query on Google there is no telling what kind of file types will come out, so you need to make sure Google comes up with purely PNG files.


  • So now the question is: How do you make sure Google shows you purely PNG graphics? SIMPLE. When you go to Google Images, type your query and then click on Advance search.


Follow the red arrow. :)

  • Look for the one that says Filetype and click on the dropdown menu. And then choose PNG.


And then that's how you find your graphics!

You may test the graphics by opening it in Photoshop and they would look a lot like the very first screenshot. Now just a piece of advice, most PNG file types are transparent but --not all. Don't get frustrated if your first attempt wasn't right. Google will definitely find the perfect one for you!

EXERCISE: Right now you can explore Google and what it offers. If you find good PNG graphics, experiment on them using Photoshop. Open a graphic in Photoshop and then click Ctrl+A. Then try to drag the graphics where you want them to be. 


I hope I made it easy for you, but this tutorial wasn't easy to make, I tell ya! 
Hopefully you find this very useful. 

Please rate this tutorial if you find it interesting, fun, useful or difficult! (see buttons below)

Thanks guys!

Please note that all layouts are custom-made by Meg Jocson and Kick-Ass Ads.

A LOOK INTO WHAT'S NEXT: Most PNG file types are transparent but again--not all. But there's a way to turn other filetypes into PNG! That's what's next!